Concussion on the Slopes: Your Guide to Recovery and Resilience

It's that time of year again! The snow is snowing, and the senders are full sending. Throughout the snow season there is a lot of talk about mountain safety and what to do if you find yourself in a tough situation. One topic that isn't quite talked about enough is what happens if you sustain a concussion on the mountain.  

A concussion is a functional injury that occurs from an impact to the head, neck or body causing disruption to normal brain function. Symptoms can show up within minutes, hours or days.

If you suspect you might have a concussion follow the steps below to help get started in your recovery:

1. Tell a friend & head down the mountain safely.

Make your way to the health care clinic to get assessed. Warning signs for a more severe head injury usually present themselves within four to six hours. Some signs would include increased confusion, unusual behaviour, repeated vomiting, neck pain or seizures. Once a more severe brain injury has been ruled out, it's time to take the next step.  


2. REST

After you initially sustain a concussion, your body goes into an 'energy crisis'. This could result in you feeling very tired. The best thing you can do is allow the body to rest. Sleep allows healing to take place. Limit activities, work and screen time within the first 2-3 days and ensure you take it easy. It's important to note that having a structured gradual return to activities and work is key. Going back to your 'normal' too soon can lead to prolonged symptoms. 


3. Now it's time to MOVE!

You read that right. As we know, movement is medicine for the majority of injuries or illnesses. Concussions are no different.

Structured aerobic activity is recommended as the best form of exercise to help kickstart concussion recovery. A recumbent bike can be one of the best options if you are suffering from dysfunctions of the vestibular and oculomotor systems. If you do not have access to a bike, that's okay! Whatever movement style you choose (think low intensity activity, not Whistler extreme sport activity), the goal is to elevate your heart rate and sustain that heart rate zone for small increments at a time. To begin, you need to find your max heart rate (220-age). Then multiply that number by 0.5 (more sedentary lifestyle) or 0.6 (active lifestyle). That is your starting heart rate zone. Gradually increase this zone every couple days or as your symptoms can tolerate. To help gauge your symptoms, use a two point scale. If your symptoms are at a 2/10 to start, don't surpass a 4/10. It's okay to push into your symptoms a bit, but try not to overdo it. This scale can be applied to any activity you do day to day.  


4. seek professional help

It's important to seek professional help to further investigate your symptoms. Research shows the sooner you can seek help (within 7 days), the better chance of reducing the risk of prolonged recovery. Finding a practitioner in your area who has experience with concussion rehabilitation is key. Symptoms can be due to dysfunction in your oculomotor, vestibular, neck, autonomic, affective and/or cognitive systems. Different practitioners will specialize in one or more of these systems. It can take an army but start with a practitioner you know and trust. They should be able to help guide next steps or refer you to more appropriate help.  


We’re here to help you

Concussions can be frustrating, lonely and long if not taking the proper first steps in a timely manner. If you or someone you love is suffering from a concussion, please know that like any other injury, it can get better. Give yourself grace, have patience, and know that help is out there!  


5 Benefits of Working Out With A Partner

Why work out alone when you can team up and make it twice as fun?

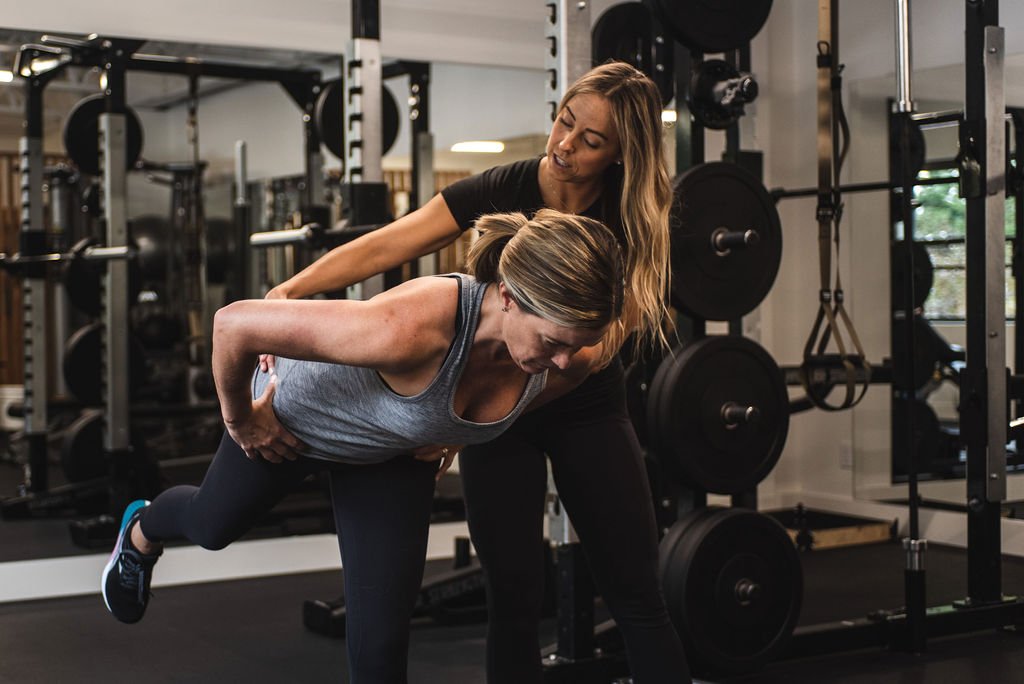
Partner workouts aren’t just about breaking a sweat—they’re about building motivation, sharing laughs, and challenging each other to crush those goals. Whether it's your best friend, significant other, or even a co-worker, having a buddy by your side makes every workout better.

Here’s why hitting the gym together is a total game-changer:

1. Motivation Boost

Let’s be real—dragging yourself to the gym solo isn’t always easy. But with a partner, you’ve got someone counting on you, making it way harder to skip out. Once you're there, having a friend by your side can make all the difference, encouraging you to push for that one extra set. Studies back this up: people who work out with a buddy are more likely to stick with their routine!


2. Healthy Competition

A little healthy competition never hurt anyone! Training with a partner can push you to reach beyond your comfort zone. We tend to perform better when we know someone else is right there with us, challenging us to keep going. Whether it’s squeezing in one more rep or finishing a workout a bit faster, having your partner or bestie next to you will help.


3. Bonding Time

Working out doesn’t have to be all sweat and struggle. Partner workouts are the perfect way to hang out while breaking a sweat. It's a chance to share some laughs, get out of your comfort zone, and make fitness a part of your routine together. No more scrolling through your phone or binging another Netflix series—swap it out for a workout that leaves you feeling accomplished.

4. Support and Encouragement

When things get tough, that’s when a workout buddy steps up. They’re there to encourage you when you want to quit and push you to go a little further. Whether it's lifting heavier weights or sticking with a challenging workout, having someone by your side can make all the difference. It’s not just about accountability; it’s about sharing the highs and lows and making the journey more enjoyable.


5. Affordable, Personalized Coaching

Training with a friend is a great way to get the guidance of a coach without the full price tag of a one-on-one session. It’s all the expertise, encouragement, and personal feedback you’d expect, but with the added bonus of a workout buddy. And it's a fun way to hit your goals together without stretching the budget, especially this month, with our Partner Training Sale. See info below!


train together for less

To celebrate Whistler Blackcomb Opening Day, we’re kicking off a huge Partner Training Deal!

Bring your partner, bestie, co-worker, or family member and get 5 Partner Training Sessions for the price of 4 — just $310 per person.

Plus, unlock exclusive discounts with our member perks:
20% off Scandinavian Spa (Mon-Thurs)
15% off at The Raven Room (3pm-12am)
25% off at McCoos
25% off at RipCurl
10% off at Hundo-P

Click Here and send us an email to book your spot or to find out more information.


Get Your Legs Ready for Ski Season with These 5 Essential Exercises

With the mountain opening this month, it’s time to get those legs ready! Our trainer Kaitlin shares her top five exercises to build the strength and stamina you’ll need for an epic season.

Here are 5 exercises I program for my clients to help them get ready to crush big days on the mountain!

1: squats

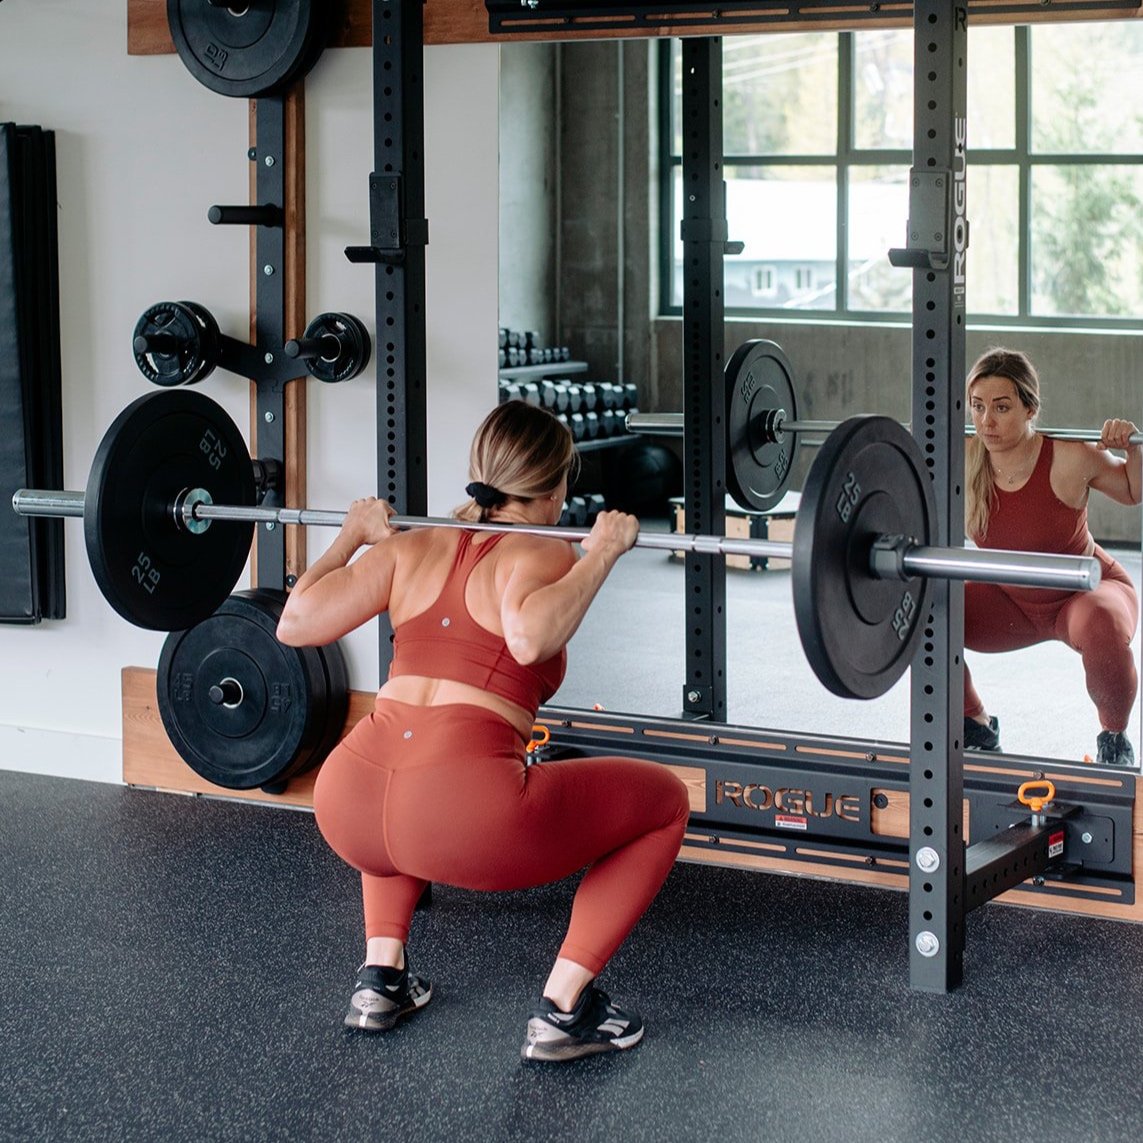
Squats should be a priority in your program as they help you build strong quads, glutes, and adductors, all muscles you use daily on the mountain. While I’ll often program a Barbell Front Squat or Back Squat for clients, you don’t have to use a barbell to benefit greatly from this exercise.

Grab two dumbbells and hit a Front Rack Dumbbell Squat instead!


2: Romanian Deadlifts

I love the Romanian Deadlift to help clients build their posterior strength (glutes, hamstring, back). 

When performing this exercise, I remind clients that it’s all about the hips. Think about moving from your hips. Your hips go back, your hips come forward, and the rest of the body is along for the ride.


3. Lunges or Split Squats

Single-leg exercises are TOUGH, no question about it, but they should be in your program. 

Make sure you push yourself as hard on your single-leg exercises as on your squats and deadlifts. This is super important and something I think a lot of people could improve in their training.

Here are a few of my favourite lunge and split squat variations:

** While I am using a barbell for the Reverse Lunge and BSS, you could use dumbbells too.


4. Sissy Squats

The Sissy Squat is an advanced exercise to target the quads and exposes the knees to some ranges they may not usually get to explore.

If you’ve never done this exercise, place a small box or step on the ground to decrease the range of motion. Over time, build up to doing these right to the floor.


As you get stronger with these, you can even add some weight to them!


5. Plyometrics

I like to utilize a variety of bilateral and single-leg plyometric progressions with my clients, first focusing on absorbing force and then moving to producing forc

This could include exercises like:

  • Pogos

  • Box jumps

  • Seated box jumps

  • Depth jumps

  • Squat jumps

  • Lunge jumps

  • Broad jumps

There are a huge array of plyometric exercises you can choose from so make sure you start with something appropriate for where you’re at and progress from there.


Our Favourite Overnight Hiking Hacks

Our Favourite Overnight Hiking Hacks

We are well into Fall, also known as, the best time of year to put on those hiking boots and hit the hills! The temperature is perfect for some upward grinding, the colours are absolutely beeaaa-u-tiful and if you’re lucky, you might even get some snow-capped mountain views as the winter slowly rolls in.

Before you start packing, check out our Peak Training tried and true hiking hacks, almost 100% guaranteed to make your mission all the more epic!


Pack it in

At this point, it should go without saying that a well-fitting backpack will save you a world of pain. We like the Osprey Atmos Aura backpack. But let’s focus on how you’re packing. Almost everyone has their own packing style, and we’re sure many of you probably make use of compression sacks to get those bigger items down to size. But what if - and stay with us here - you treated your pack itself as a compression sack? 

Mountain views on a hike in Canada

Trails await. Photo by Kaili’i Smith

Hear us out. If you’re putting your sleeping bag in a compression sack, your sleeping mat into a compression sack, your clothing into packing pods and trying to fit food in there… Even if you’ve individually packed everything as small as possible, when you put it all into your bag, there’s still nooks and crannies of wasted space as you “tetris” everything in. Instead, pack your sleeping bag down into the bottom of your pack, compressing it as much as you can. Then do the same with all your other items, in effect, making your pack a giant compression sack, with zero wasted nooks!

So next time you’re staring at all your stuff before a big multiday, wondering how the hell you’re going to fit it all, give this method a go.


Foot stuff

Excuse us for a moment while we talk about feet. They deserve it! They’re the ones that are going to carry you to the mountaintops!

Here’s our first foot hack. Even if you have the perfect hiking boot (shout-out to our faves VIVO BAREFOOT Tracker hiking boot), sometimes blisters are inevitable. Here’s how to keep them at bay; before the hike, use a blister stick on high-rub areas. The minute you feel any kind of uncomfortable rubbing, stop to put a Moleskin or a band-aid  on it immediately. Don’t wait until you already have a blister or torn skin! 

Keep your feet happy on the uphill. Photo by Kaili’i Smith

Also, if you know that you’ve got a problem spot that just seems to always blister, get some pieces of raw merino wool, put it on the spot, slip on your sock to keep it in place and it should help prevent rubbing from the get-go! If you’re not sure where to get merino wool, stop into a shop that sells merino clothing (brands include Icebreaker and SmartWool). They’ll sometimes have samples on hand for product training purposes.

If you’re using new boots, carry your old boots with you on the first few hikes. It’s a bit of a pain, but it’s much better than being miserable as you try to break in the newies. Then you can switch out when you’ve had enough.

Finally, the most underrated feet treat for hikes - HUT BOOTIES. Switching out of your boots and into a pair of these at the hut or campsite is pure heaven. There are several brands that make them, including The North Face and RAB. (These also double as the best apres booties in the winter).


Creature comforts

Forget about feeling too bougie - lightweight inflatable pillows are awesome. And they pack down small enough to fit in the palm of your hand. When you lay your head down after a long day of walking, you’re going to appreciate every penny you spent on one of these. They’re also great for long-haul travel - think sleeping in airports or on the plane. Two birds, one stone.

Are we there yet? Photo by Kaili’i Smith.

If you’re still stubborn enough to go pillow-less, do yourself a favor at night; grab your puffy and fold the arms across the chest. Then roll it up from the hemline to the neckline and pull the hood over the roll. Bam, you’ve got yourself a makeshift pillow. 

Another nice touch if you’re at a hut is to bring tiny tea candles. When it gets dark, the candles create such a nice ambiance in the hut. 

Finally, alcohol. Nothing hits better than a good swig after a long hike. To keep things light, try to keep your vessels to cans. Nothing sucks more than having that extra weight on the way up and then having to carry an only marginally lighter glass bottle on the way down - heavy and that’s empty space in your pack! With a can, simply stomp on it to crush it and save precious space.


Location, location, location

This will do nicely. Photo by Kaili’i Smith

If you’re fiending to go to a bucket list spot, but you hate the idea of the crowds, put it in the calendar for late season or even winter, it’s almost always less busy. Especially if you’re wanting to hit up some famous BC hot springs, don’t even try it during the peak summer season. Odds are you’ll get there, see the sheer volume of people in the water and not even want to go in.

Extras

In our opinion, you’ll never regret bringing an extra layer or an extra dehydrated meal. And if you can get a dehydrated meal that comes in a resealable container or bag, you can use it when you’re done eating to store your other food wrappers and garbage for the walk back down - always pack in, pack out people!

And now, to the trails!

Five Common Concussion Myths DEBUNKED

For the third installment of our concussion blog series, we’re debunking five common myths around concussions with a brief explanation of the better actions to take to aid in recovery and reduce long-term symptoms.

DISCLAIMER

These blogs are meant to give you some insight into concussion research and concussion rehabilitation. Concussion research is elaborate, and at times hard to understand. These blogs are meant to simplify the science around concussions, and provide helpful information for you to use whether you are experiencing a concussion, or, know someone who is. This is not a completely comprehensive look at concussions, there is a ton of research out there that we may not touch on. If you are someone who is experiencing a concussion, please seek medical attention. These blogs are meant to support you or a loved one in their concussion journey, not replace seeking individualized help.


MYTH 1: HELMETS PREVENT CONCUSSIONS

That's right, there is little evidence to support that helmets prevent concussions. Remember, concussions occur by the brain hitting the skull. Helmets can't eliminate the consequences of a powerful force generated by a direct or indirect blow to the head. HOWEVER, this doesn't mean you should stop wearing one! Helmets are valuable tools to help prevent impact type brain injuries, like a skull fracture, intracranial bleeding or lacerations.


MYTH 2: IF YOU DON’T LOSE CONSCIOUSNESS, YOU DON’T HAVE A CONCUSSION

Loss of consciousness is a pretty solid indicator that you have sustained some kind of brain injury. However, majority of concussions don't result in loss on consciousness. Research is investigating whether loss of consciousness is a predicting factor of prolonged recovery or Post Concussion Syndrome (PCS). PCS is a term used regarding people still experiencing symptoms three months post concussion. If someone has lost consciousness for over a minute or longer, it could indicate a more severe head injury and they should be monitored and seek medical attention.


MYTH 3: YOU HAVE TO WAKE SOMEONE UP EVERY FEW HOURS IF THEY’VE SUSTAINED A CONCUSSION

As previously mentioned in "Concussion Pathophysiology", when a concussion is sustained, the body goes into an energy crisis. This energy crisis leaves us feeling extremely fatigued. So what do we usually do when we're fatigued? SLEEEEEEEP. Sleep is such an important healing mechanism when it comes to concussions, especially early on. The whole idea behind waking someone up every few hours comes from the fear that the individual has sustained more of a severe head injury that could be fatal. You should seek medical attention right away if the person has:

  • increased confusion

  • unusual behaviour

  • reduced loss of consciousness

  • neck pain

  • repeated vomiting

  • seziure

If there are no alarming symptoms post impact, the best thing you can do is encourage rest and sleep!


MYTH 4: SIT IN A DARK ROOM AND WAIT IT OUT

Alas, this one is my favourite. Before I knew anything about concussions and concussion rehab, I to fell victim to this myth. When individuals experience concussions, they can be triggered by light, noise, reading, writing, socializing, driving, etc, etc, etc. So, what made sense at the time was 'well okay, let's avoid all of that and keep them in dark room. CURED. YARIKA!". Made sense at the time. What we now know is that we need that gradual exposure to our symptom triggers and activity in order to recover from a concussion. The brain needs exposure to build new neural pathways. As we know from "Concussion Pathophysiology", our neural pathways can be severely damaged and new ones need to be formed. "Waiting it out", can only prolong recovery. If you've just sustained a concussion (24-48 hours post), or you're incredibly symptomatic, sitting in a darker, quiet room can help promote rest, and contribute to the dissipation of symptoms. But remember, we NEED to expose ourselves to daily activities in order to build tolerance and recover.


MYTH 5: IF YOU DON’T HAVE SYMPTOMS IMMEDIATELY, YOU CAN GO ABOUT YOUR DAY NORMALLY

This is one of the trickier parts about concussions. Sometimes, symptoms don't show up for hours, days, or even weeks. There is no predictor as to when you'll experience symptoms. You might experience symptoms such as headache or dizziness initially, but symptoms such as sleep disturbances, depression/anxiety, and irritability can occur later on. Research is still investigating what causes the delay in symptoms. It could be due to prolonged pathophysiological change in the brain after a concussion, or it could be due to more psychological factors. Furthermore, people can be more genetically predisposed to certain symptoms which can impact their experience and recovery time. As mentioned in “Concussion Pathophysiology”, it can take weeks for the initial cellular damage to recover, even in the absence of symptoms (e.g. normal blood flow takes up to 14 days to recover!). Therefore, even if you feel fine, the best practice is seeking professional help and following the proper protocol for return to work and play. Remember, BRAINS ARE COMPLICATED AND WE STILL DON'T HAVE ALL THE ANSWERS.


There are lots of myths out there around concussions and concussion rehab. Get the facts! Talk to a healthcare provider about what the best practice is to help manage your concussion. Concussion rehab is continuously changing (gets better and better!), so it’s important to continue to ask questions and seek guidance if you suspect you’ve sustained a concussion.

Ready to reach out? Fill out the form below.


References

  1. Elkington, L., & Hughes, D. (2016). Australian Institute of Sport and Australian Medical Association Concussion in Sport Position Statement. Australian Institute of Sport.

  2. Harmon KG, Drezner JA, Gammons M, et al. (2013). American Medical Society for Sports Medicine position statement: concussion in sport. Br J Sports Med, 47, 15–26.

  3. Ellis, M.J., Leddy, J., Willer, B. (2016). Multi-disciplinary Management of athletes with post-Concussion syndrome: an evolving pathophysiological approach. Frontiers in Neurology. 7: 136.

  4. Alsalaheen, B.A., Mucha, A., Morris, O.L., et al. (2010). Vestibular Rehabilitation for Dizziness and Balance Disorders After Concussion. Neurology Section, APTA 34: 87-92.

  5. Leddy, J.J., Baker, G.J., Willer, B. (2016). Active Rehabilitation of Concussion and Post-concussion Syndrome. Physical Medicine and Rehabilitation Clinics of North America. 437-454.

Training Load Management for Multi-Sport Enthusiasts

Training Load Management for Multi-Sport Enthusiasts:

A Numbers Game


Season Transition Time

As we close the book on another summer in the Sea to Sky corridor, many of you may be reflecting on how your activities have been going this year. How have you been doing on the bike? Did you get to those hikes you wanted to do? How are your fitness levels? You may also be starting to think about the upcoming winter. Are you ready to ski/snowboard? How will you feel on the skin track? What kind of gym routine do you envision moving forward?

There are a lot of variables influencing your daily, monthly and yearly training: schedules, interests, weather, social influences and many more. The purpose of this blog post is to IGNORE all of these variables…because (for better or for worse) your body does not care about them!

So, what DOES your body care about when it comes to fitness?


Training Load

The catch-all concept that we will discuss in this post is Training Load.

Training Load can have a few different meanings but in general terms it is the total amount of exercise that you are getting expressed over a set period of time. In 2022, there are many different ways to quantify training load. Our collective obsession with data analytics and technology has led to the development of a multitude of products seeking to provide you with the most cutting-edge information about your training.  The growth of the fitness tracking sector has made useful metrics much easier to assess for those armed with these devices, but no matter what is strapped to your wrist it is still important to understand the basic concepts around training load.

Time For Some Math

One method for quantifying training load is to use the concept of Session Rating of Perceived Exertion (Session RPE).

Session RPE = Session Duration X Session Intensity (based on subjective report)

This calculation depends on you rating an exercise session on a scale such as the one pictured here from easy to difficult. This subjective rating is then multiplied by the duration of the exercise session, usually in minutes.

For example, let’s say you go on a casual 20-minute walk with your dog that you rate 2/10 for effort:

(20 min) X (2) = 40 Session RPE

Now let’s take another example, where you go for a 2 hour bike ride that you rate a 7/10 effort:

(120 min) X (7) = 840 Session RPE

You now have a standardized way to compare these two very different activities. In the next section you will see how to use this concept to assess training load over a longer period of time than just single sessions.

Time for A Bit More Math

Session RPE’s can be used over the long term to assess whether you are training too little or too much based on your fitness level. If we take the above examples as two separate bouts of exercise in the same day for this individual, we see that

Dog Walk + Bike Ride = Daily Training Load

 40 + 840 = 880

If you record your activity in this way over the long term you can get a good picture of what training load your body is accustomed to managing. For example,

Take a month where you have an average daily training load of 500.

This week you decide to add in a daily new activity on top of your normal routine.

After you do your calculations, say this brings your average training load for the week to 750.

Your average training load for the week is 50% greater than it was the preceding month. This is a big jump and you might be stiff, sore or possibly even overtrained leading to feeling run-down.

Acute increases in activity should not exceed ~30%, to avoid overtraining.

Now let’s take a look at the flip side:

Take a month where you have an average daily training load of 500.

This week you are busy with work and don’t get the time to train that you wanted.

After you do your calculations, say this brings your average training load for the week to 250.

Your average training load for the week is 50% less than it was the preceding month. This is a large decrease, and it may be important to ease back into your routine gradually to avoid injury.

Acute decreases in activity exceeding ~20% should be noted as possible detraining can occur.


 Summary

In this post we have discussed the general concepts around managing training load. As your training fluctuates, your fitness levels follow. Generally, when you seek to improve your fitness, you are trying to gradually increase the training load that your body can tolerate. There is a delay between your training stimulus and the body’s adaptation, so it is important to be patient with the process! This concept applies to every type of physical activity.


Keep these ideas in mind especially when seasons change, and you transition in your daily activities. These transition times may require you to temporarily reduce certain training sessions to allow successful re-adaptation to the activity you are picking back up!

Kinesiology and Chronic Pain - How We Can Help

Chronic pain is a debilitating and often invisible monster that can steal our joy, alter our lifestyles and cause silent suffering. Whether the cause is an illness, a nagging injury or a crippling accident, incessant pain can change who we are and steal our hope that the future can be any different.

It doesn’t have to feel so helpless. Working with a Kinesiologist can drastically improve the function of your body and decrease the experience of pain wiith the implementation of a individualized exercise program. Further, we focus on a deeper level of healing incorporating the mental and emotional side of pain. So how do we help?

  1. We take a look at how your body moves to see if’s there an opportunity for improvement.
    A biomechanical analysis of your movement patterns can showcase where you may have deficiencies in strength and mobility which can be amplifying your sensations of pain. Chronic pain in one area can mean movement deficiencies at another location in the body so we take a full-body approach to ensure your overall funtionality is the best it can be.

  2. We understand the mental and emotional toll of your experience.
    We’re compassionate and empathetic about your experience which is just as important as acknowledging the physical side of pain. We help with stress reduction, building mental resilience and creating lasting habits so that you can learn to manage your symptoms on your own.

  3. We know how to safely and slowly progress your programming to obtain optimal results.
    There’s no one-size-fits-all program for any type of pain or injury. Every body has it’s own unique needs and limitations that must be taken into account. We will cater your program to exactly what you and your body need while taking small but consistent steps to improve your quality of life.

  4. We listen.
    We’ll take your feedback and alter your programming to best suit your body no matter where your at in your healing journey. Did something hurt or get worse? Tell us. Has an exercise improved your pain drastically? Keep us posted. We take in all of the feedback in order to better service you and your individual situation.

  5. We spend quality time.
    No quick appointments here and no rushing; we take a full hour to analyze, guide, prescribe and understand exactly what’s happening so we know how to program in-depth for your needs. A consistent weekly appointment keeps you on track and allows us to ensure your always improving and seeing results.

Medication and physiotherapy aren’t the only ways to manage your pain. If you’ve tried “everything” but haven’t had any success, we would love to set you up with a complimentary consultation with one of our kinesiologists to see if exercise therapy is right for you.

Email us at team@peaktrainingwhistler.com or reach out through the form below to set up your appointment.

Top Tips for Learning to Mountain Bike

Our Favourite Tips For When You’re Learning to Mountain Bike


Cover photo by Robin O’Neill for the Whistler Mountain Bike Park

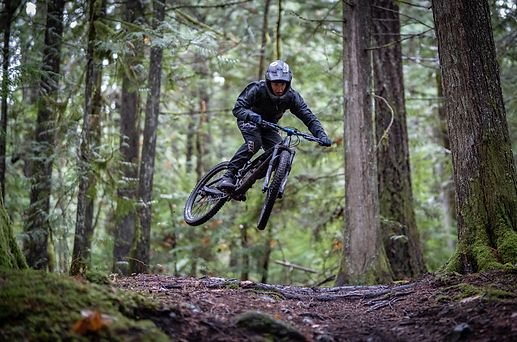
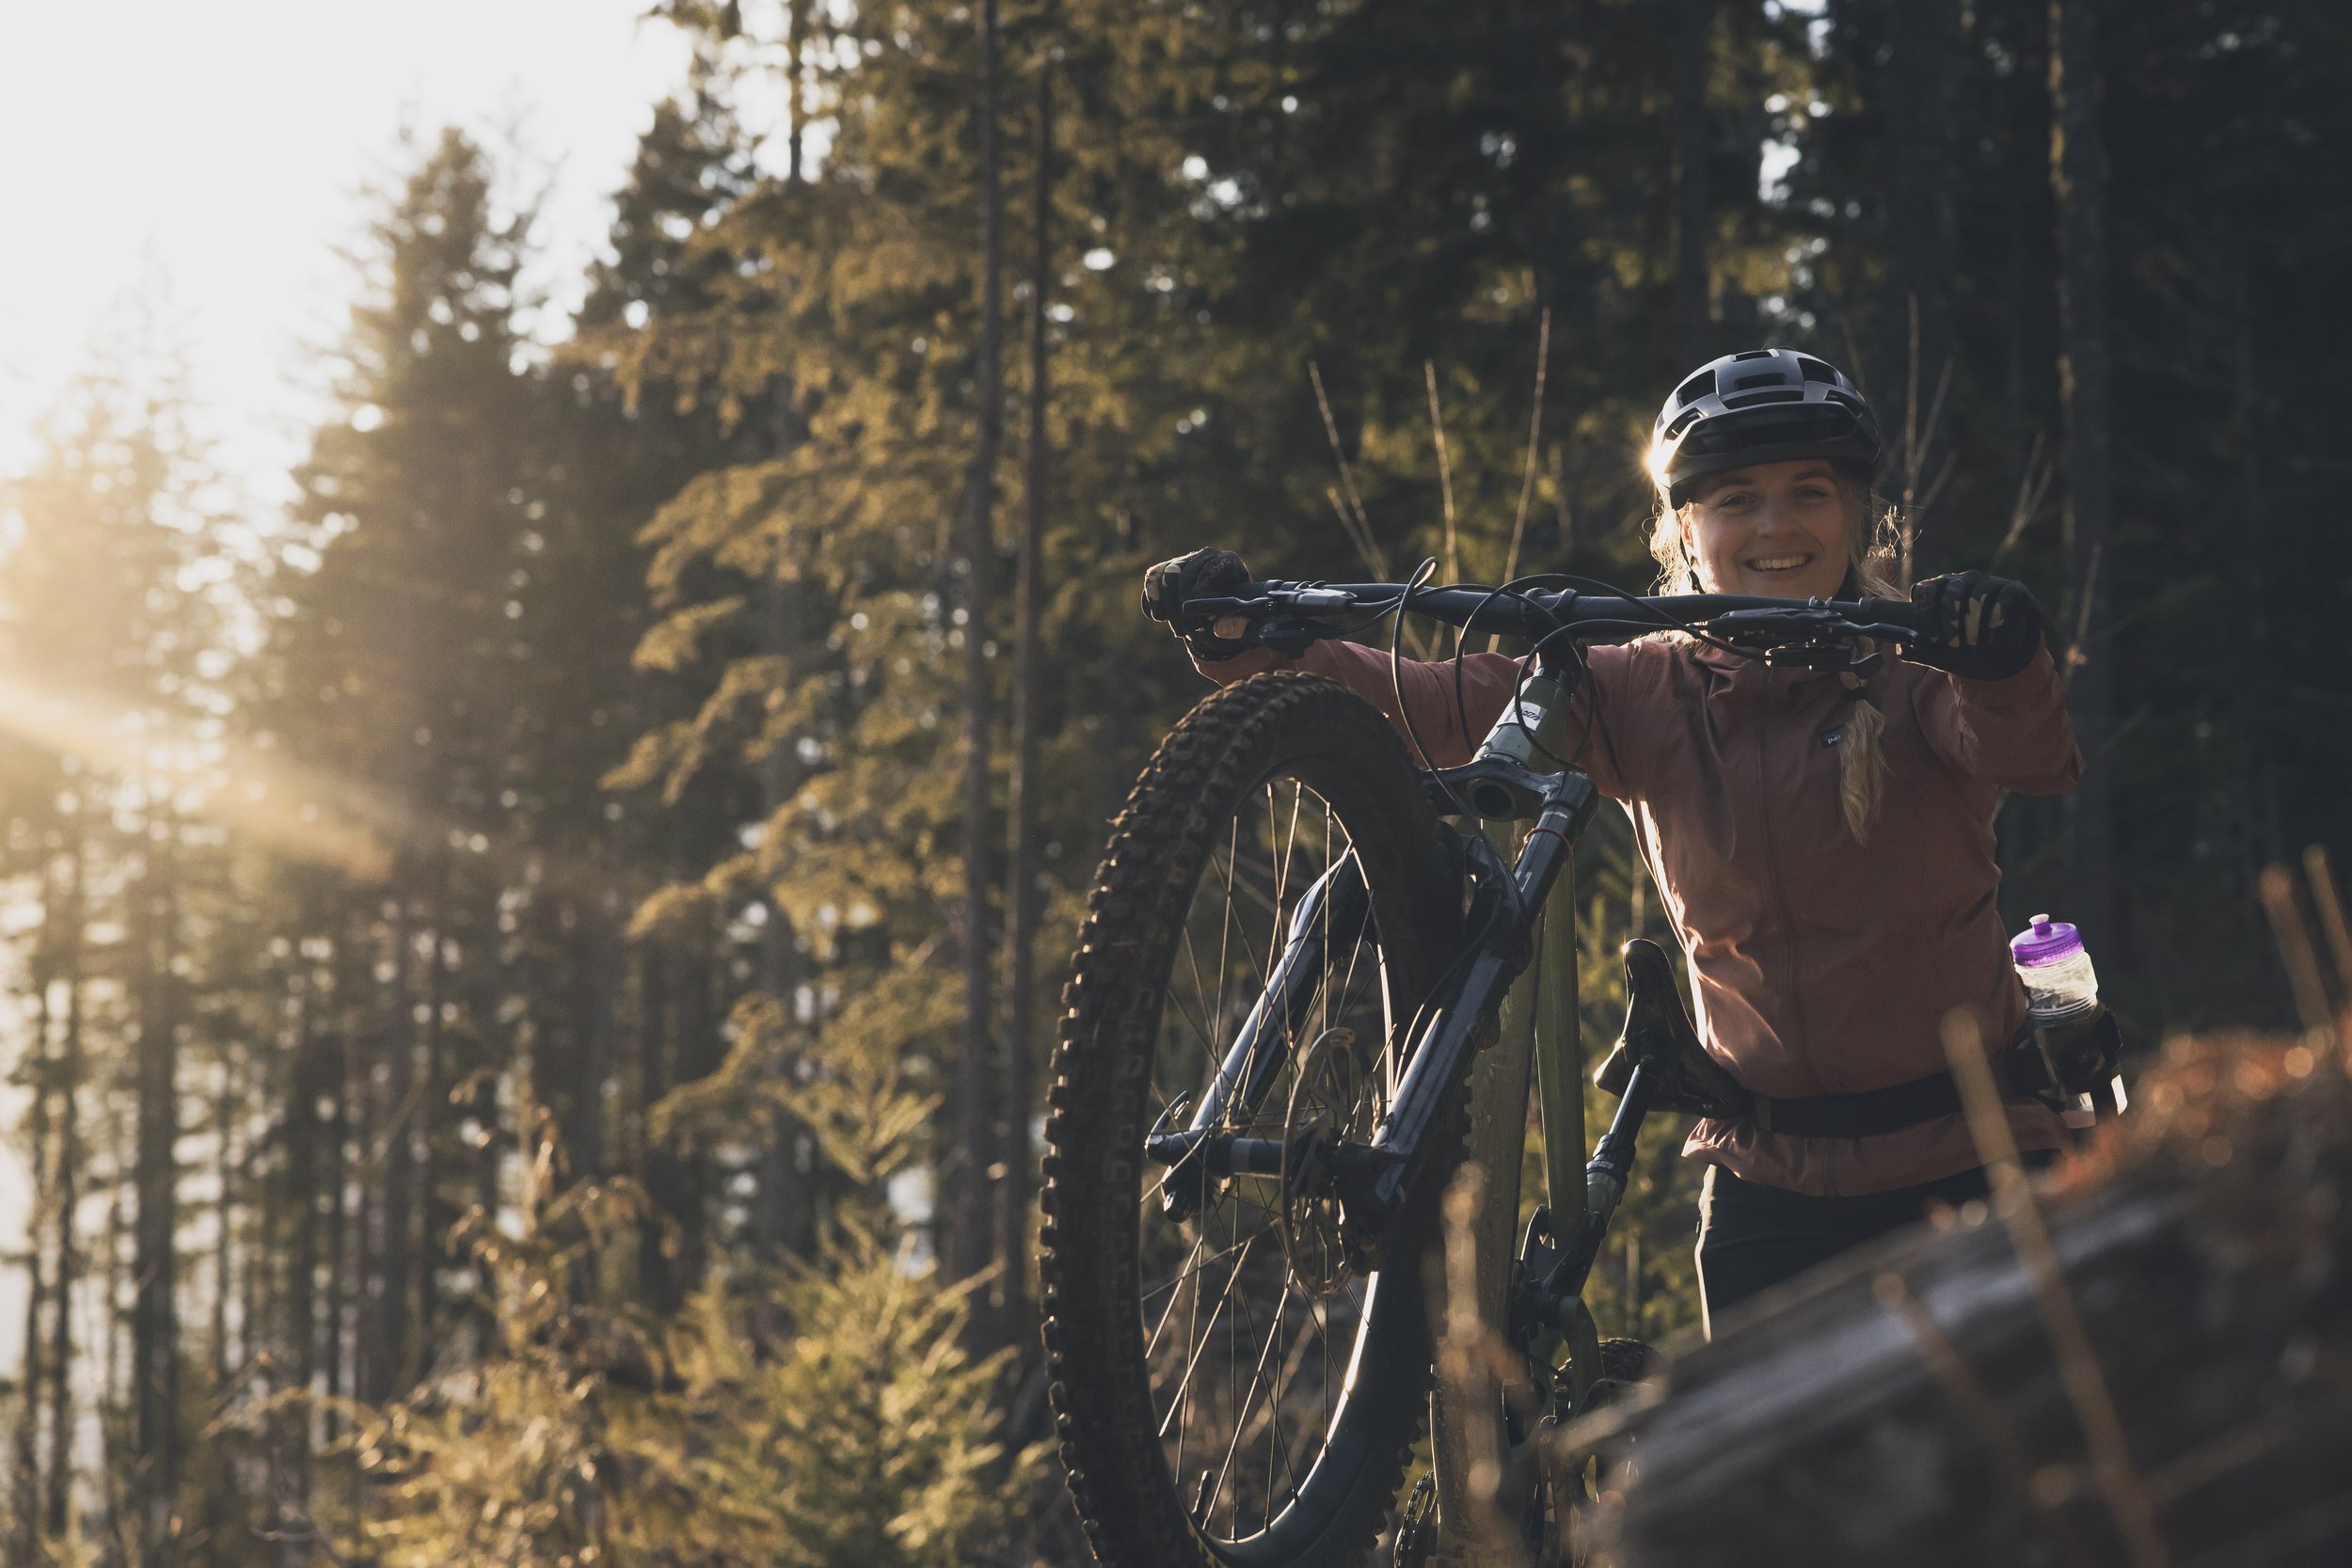
As an adult, it takes some serious bravery to start a completely new sport. Let alone one as rowdy as mountain biking. Where do you even start?!

Here at Peak Training, we’ve been there. Being based in Whistler, BC - ie. the MECCA of world-class mountain biking, we couldn’t not learn how to mountain bike. 

And sure, some of the more hearty among you might think, “I’ve known how to ride a bike since I was 5 years old - I’ve got this!”

And that’s awesome! Get out there and get shredding. But for those that might need a few tips before hitting the trail - we feel you too. So here are our favourite tips from when we started learning to mountain bike.


Gear up

When you first start riding, you’ll probably notice all of the different types of gear out there. You’ve got your full-face helmet, your enduro helmet, trail helmet, elbow pads, full body armour, knee sleeves, knee pads, shin guards… and that’s just the protective equipment!

And don’t even get started on the prices. 

Now, let’s not put your firstborn child up for sale on Facebook Marketplace just yet. When you’re just learning, take it slow. Buy one piece of equipment every couple of weeks, or even once a month. Soon, you’ll have everything you need to feel (at least a little) more comfortable on the trails.

MTB and Training Coach, Becky Jordan

What items should you prioritize? A lot of experienced riders will tell you to get a good trail helmet (that one is given), get some flat shoes (your old pair of Vans will do, although proper MTB shoes are the best) and get some gloves (because, guess what hits the ground first when you fall?).

From there, take your time, save up and invest in the gear you want!


Looking to save? Check out Whistler Mountain Bike Buy/Sell/Swap here.

Ready to invest? Check out Arbutus Routes in Upper Village or through their online shop.


Find your safe space

There are so. many. trails. in Whistler. And even if you don’t live here (side-note: what are you doing?!), MTB trails are springing up all over the place!

When you first start, find a trail system, or even better, a loop that has a wide variety of different challenges; rooty sections, uphills, downhills, bridges, corners, maybe even the odd rockroll or drop. Get familiar with that trail and use it as your personal proving ground. Soon, you’ll know every crack and crevice along the ground and you’ll be able to hone your skills on terrain that you know and are comfortable with. Those skills will transfer over when you’re ready to take on your next level-up.

Enjoy beautiful lake and mountain views after you ride around Lost Lake.

If you’re in Whistler, we highly recommend the Lost Lake trails. There’s some great loops in there and the variety is perfect for those that are just starting out!


Check out the Lost Lake mountain bike trails here on TrailForks.


Look ahead

This one is so simple but so easy to forget when you’re on your bike. Make it your mantra. Look ahead, look ahead, look ahead

When we ride, we tend to look down at what’s right under our front wheel. Which is okay, but you’re missing what’s coming up! And how to navigate that! So, look ahead.

And, in tandem with this mantra, here’s another: look where you want to go. That big rock on your left? Don’t look at it; don’t get fixated on it. Because the moment you do, your arms will turn your handlebars in that direction as if they are independent from your body. To you, that rock may as well not exist - because you’re not paying it any mind. 


Speed is your friend

Admittedly, this is a controversial one. But hear us out.

Athlete and Coach, Katrina Strand.

It’s only natural to take things at a slower pace when you’re learning something new. You’re literally training your brain and body. 

But once you start to get into the flow of things, start experimenting with charging over obstacles and natural features just a liiiiittle faster than you normally would. You’ll find that the bumps feel smaller and that your bike goes over things more smoothly. And as you get better and better, speed will quickly go from acquaintance to BFF status. 


Don’t let the falls get you down

Here’s the thing you probably don’t want to hear: you are going to fall. It is inevitable. Most likely, you will be able to stand up and walk away from said tumble. Your body will be fine, albeit maybe a little bruised. But you know that those scrapes and scratches will heal quickly.

What might not heal so quickly is your head. Your mentality. A fall, no matter how minor, is scary. And it can rattle even the best riders. When you do get back on the bike, you may find yourself imagining all the ways you could bail on every feature. 

If you’re in this for the long game, you’ve got to get back on your bike ASAP and yell at the little scared voice in your head, “we will be fine! We are capable! We can do this!”

Because that’s what 99% of MTBing is (we may have guesstimated that statistic): a mental game. It’s rolling over the top of something f*cking terrifying and at that last second knowing - with absolute certainty - that you’ve got this; and then totally rocking it. 

That’s the feeling that keeps us coming back to this incredible sport. The pure adrenaline of conquering something that used to scare our pants off. The progression and pushing boundaries. And we promise, if you stick with it; you’ll fall in love.

Oh and we’re also in it for the post-ride beers.


Cheers and see you on the trails!

Looking to build your confidence and skills on two wheels? Check out our Mountain Bike Strength class by clicking here.

Basic Concussion Pathophysiology

In the last blog I gave you a general idea of what a concussion is and how it affects us. But have you ever wondered what actually happens to the brain on a cellular level when we hit out head?

DISCLAIMER

These blogs are meant to give you some insight into concussion research and concussion rehabilitation. Concussion research is elaborate, and at times hard to understand. These blogs are meant to simplify the science around concussions, and provide helpful information for you to use whether you are experiencing a concussion, or, know someone who is. This is not a completely comprehensive look at concussions, there is a ton of research out there that we may not touch on. If you are someone who is experiencing a concussion, please seek medical attention. These blogs are meant to support you or a loved one in their concussion journey, not replace seeking individualized help.

Glossary

  • Pathophysiological: Disordered physiological process due to injury or illness.

  • Neuron: Another name for a nerve cell that comprise our nervous system.

  • Dendrites: Top of the neuron. It receives information from neurotransmitters.

  • Neurotransmitter: How neurons continuously communicate with each other and send messages throughout the body.

  • Ion: a molecule with a net electric charge due to the loss or gain of an electron(s).

  • Action Potential: A nerve impulse which causes movement of ions across cell membrane.

  • Axon: Middle section of the neuron where an action potential is passed.

  • Sodium Potassium Pump (Na+/K+ Pump): System that maintains resting potential in a neuron. Resting potential consists of maintaining an electrochemical gradient of negative ions on the inside, and positive ions on the outside.

  • Mitochondria: Powerhouse of the cell! Creates energy for the cell (ATP)

Nerves can vary structurally depending on the responsibility they have in the body (e.g reflex nerves vs. gut nerves). Our bodies are made up of trillions of nerves that help transport information about our actions, thoughts and emotions throughout our body every second, of every day. Cool right? If you have little experience with anatomy and physiology, let me try to explain how our nerves communicate with one another in the simplest way possible. Please refer to picture and glossary.

Image by Makenzi McLeod

Our nerves function by maintaining an electrochemical gradient between the inside (intracellular) and outside (extracellular) of the nerve membrane. At resting potential the intracellular membrane has a negative charge, and the extracellular membrane has a positive charge. Once we go to initiate movement, have a thought, or literally ANYTHING, this is what happens..

  1. Dendrites receive information from neurotransmitters, thus opening up ion channels.

  2. Accumulation of positive ions in the membrane create an action potential.

  3. Action potential triggers more ion channels along the axon to open, causing an influx of positive ions into the membrane.

  4. Action potential is continuously transported down the axon through opening of ion channels. Think of it like a wave travelling to shore!

  5. After an action potential has passed each section of the axon, resting potential is restored by efflux of positive ions, and the Na+/K+ Pump. This is known as the refractory period. Another action potential is not able to fire during this time (lasts for roughly one millisecond).  

  6. Action potential reaches synapse terminals where more neurotransmitters are released to dendrites of another neuron.

  7. REPEAT.

Neurotransmitters are the body's chemical messengers. They act as the communication line from one neuron to the other, ensuring messages are appropriately transported throughout the body. Neurotransmitters can be classified as excitatory or inhibitory. Excitatory neurotransmitters (e.g. norepinephrine) increase the likelihood an action potential will occur. Inhibitory neurotransmitters (e.g. GABA), decrease the likelihood of an action potential to occur. Which makes sense! It's in the name!

The Na+/K+ Pump is a protein embedded in our cell membranes that regulates the neuron's resting potential. The pump works to transport three Na+ from the intracellular membrane to extracellular membrane, and two K+ from the extracellular membrane to the intracellular membrane. Thus, more positive ions travel out, keeping the inside of the membrane more negative.

Like any functioning pump, it needs a source of energy in order to work. Introducing, ATP! The body's energy source derived from the breakdown of glucose. When phosphorus (P of ATP) binds to the pump, it changes the opening of the protein from the intracellular to the extracellular membrane. This is how Na+ and K+ travel over the membrane. Note, most ions need support, like a pump or a channel, to travel over the membrane.  While the Na+/K+ Pump is powered by ATP, some pumps or channels are powered by voltage. Thus, when an action potential travels down an axon, some channels will open or close due to the change of the electrochemical gradient of the membrane.

Okay, that could've been a lot of new information! But stick with me here. Now that you've gained some key knowledge (hopefully) of how our nerves are meant to function, we can now relate it to what happens when we suffer a concussion.

I would like everyone to imagine the scene from the office when Dwight is conducting a fire safety drill (If you don't know what I am referring to, for one, SHAME ON YOU. Two, here is a clip to give you an idea.

This is what happens when our brain hits our skull. DYSFUNCTION AND STRESS. Our nerves go through microstructural damage by sheering or stretching. What does it mean to stretch a nerve? Disruption to blood flow, ion channels, and neurotransmitters. All those important elements we just talked about that help us function.

Disruption of Blood Flow

When blood vessels are broken or damaged, the brain is not supplied with adequate blood flow. If we have a reduction of blood flow, it means we have a reduction of oxygen being transported to the brain. Lack of oxygen leads dysfunction and takes longer for us to heal since oxygen is a key element to promote healing.

Disruption of Neurotransmitters

When nerves are initially damaged, there tends to be a massive release of excitatory neurotransmitters, like glutamine. The release of glutamine triggers the influx of positive ions from the extracellular membrane, like Na+ and Ca+ ions. Why is this bad?  Increase in glutamine, influx of Ca+ and Na+ moving into the intracellular membrane which directly affects the function of the Na+/K+ pump and restoring resting potential.  Remember, another action potential will not be able to fire if the neuron does not stabilize by cycling through its refractory period. On a bigger scale, this means there will be delayed or lost messages from the brain or body. Furthermore, the accumulation of Ca+ can impair ATP production in the mitochondria* and can lead to cell death.

Disruption of Na+/K+ Pump

We spoke about the importance of the Na+/K+ pump in regards to maintaining resting potential in neurons. With the influx of positive ions in the membrane, the Na+/K+ pump is working overtime to try and restore resting potential. We know that ATP powers the pump. Thus, if the pump is working harder, ATP supply needs to be greater. Our body does everything it possibly can to try and supply these pumps with energy, however the supply has trouble keeping up with the demand (mitochondria dysfunction) which leads to an energy crisis. Ever wonder why you are super fatigued all the time after the initial concussion? A lot of our energy is going towards stabilizing and fixing our dysfunctional neurons and vessels.

All these changes happen within seconds, but can last up to weeks or months to recover. For example, the massive influx of excitatory neurotransmitters stabilizes within minutes, but proper blood flow is usually not restored until 10-14 days after the initial blow. That's why it's so important to start aerobic rehab within a few days of hitting your head. It promotes healing of damaged blood vessels and leads to the creation of others to restore proper blood flow to the brain.

This also brings into perspective how you need to have a structured plan to return to sport or work after the initial hit. Even if you feel 'fine' within a few days, the body needs time for the metabolic changes to subside. Going back to 'normal' too soon, can delay the recovery time and make symptoms worse. Furthermore, it can also lead to Post Concussion Syndrome, the very scary reality that your symptoms become chronic.

Everyone's recovery time looks different. Children, adults, people with predisposed health conditions will all experience a concussion differently. Why? Because brains are complicated. So it's important to find concussion rehab help right away, be patient, and listen to your body. If you are in a position to start rehab within the first 48-72 hours, do it! It is crucial to kickstart recovery and increase your chances of improving symptoms quicker.

References

Crash Course (2014). The Chemical Mind: Crash Course Psychology #3. [Video]. YouTube. https://www.youtube.com/watch?v=W4N-7AlzK7s

Giza, C. C., & Hovda, D. A. (2001). The Neurometabolic Cascade of Concussion. Journal of athletic training, 36(3), 228–235.

Sahyouni, R., Gutierrez, P., Gold, E., Robertson, R. T., & Cummings, B. J. (2017). Effects of concussion on the blood-brain barrier in humans and rodents. Journal of concussion, 1, 10.1177/2059700216684518. https://doi.org/10.1177/2059700216684518

Speed Pharmacology (2016). Neuron Action Potential (Made Easy). [Video] YouTube. https://www.youtube.com/watch?v=XnksofQN8_s

Rehab Lab (2022, March 7). Day 1 Concussion Recovery Bootcamp. [Video] YouTube. https://www.youtube.com/watch?v=gOxNefEGUv8

What is Physio-led Active Rehab?

From guest writer and owner/physiotherapist of The Balanced Collective, Danielle Boyd.

Active Rehab is a movement-specific treatment that involves all the benefits of a Physiotherapist with the combined precision of a Kinesiologist or Certified Trainer. Receive support from an expert team dedicated to reducing long-term injuries and decreasing pain, while increasing confidence and strength in your body.

Active Rehab begins with a detailed, high-level assessment completed by a Physiotherapist, who will develop a uniquely tailored treatment plan. Then, during your next session(s), a personal trainer or Kinesiologist will carry out the program under the supervision of the Physiotherapist. Finally, you’ll continue to meet with your physiotherapist in between for progress check-ins and treatment modifications.

The benefit of this setup is that the majority of physiotherapy benefits support Active Rehab sessions, as your physiotherapist is actively involved in the planning, supervision and feedback for these sessions that are carried out by highly trained movement specialists. That is a WIN-WIN for everyone!

If you have physiotherapy benefits and are interested in applying them to Active Rehab to support any injuries, chronic pain or strength deficiencies you’re experiencing, you’re in the right place.

Ready to get started? Book in your Initial Physiotherapy Intake appointmment here.

We offer Active Rehab in-person AND online!

Want to learn more about if Active Rehab is an appropriate modality for you? 

Email us at team@peaktrainingwhistler.com or fill out the form below to chat with us.

Why You Should Train Barefoot

We all know strengthening our bodies is imperative to health but did you know that training you feet is too? Just like a house, a weak foundation causes a negative ripple effect up the chain. The same goes for feet!

Each foot has 26 bones, 30 joints and more than 100 muscles, tendons, ligaments and fascia, all of which work together to provide support, balance and mobility. Three arches also exist in each foot which provide flexibility and stability in a perfect balance that allows us to move - well, at least it should be in perfect balance!

Unfortunately, modern day shoes, ski boots and lifestyle factors have changed the way our feet operate. From the moment we start wearing highly cushioned and stiff shoes, it’s been proven that our mechanics of walking and running compeltely change. This alternating perpetuates as we age and continue to wear improper shoes and our lifestyles become more inactive.

Now, we’re not saying you can’t wear cute pumps or nice dress shoes but we want to ensure you spend time either barefoot or in barefoot shoes… otherwise, your feet will start to look like the shape of your shoes. Further, exercising and training in barefoot shoes is integral to ankle, knee, hip and lower back health.

As a person with Rheumatoid Arthritis, I’ve been through quite the journey with my feet. They were the first place where I developed symptoms and I was unable to walk normally. I limped around for 6 months with painful, swollen joints on the bottom of my feet. In this short time, I experienced permanent degeneration of some ligaments in my foot that was causing a complete arch collapse and pain up the chain to my SI (sacroiliac) joint. After working with brilliant physiotherapists, I learned how to properly strengthen and support my feet and I can happily say I have very minimal issues now.

That’s when I became very passionate about proper foot wear, learning to strengthen the feet, and sharing that knowledge with others. Over the last 5 years, I’ve implemented these proven techniques to reduce clients’ need for orthotics and to decrease their many pains.

Not only do we need to emphasize exercise but also spending time with your feet in a natural state. Since we don’t live in an environment that allows us to frolic outside with bare toes all year round, we need to find shoes that are as close to natural as possible that we can wear inside.

Cue in VivoBarefoot Shoes. I got hooked on them during my search to find the perfect hiking boot. I would find many were too narrow which compressed joints causing pain, have too stiff of soles which left me off balance and rendered my feet helpless against awful blisters every time I wore them. After trying the Tracker II hiking boot, I was instantly hooked. I took them on a trek to Wedgemount Lake (if you’ve done it, you know what I’m talking about) which is no small feat. No blisters, no slipping and complete waterproofing showed me these will be my hikers going forward.

Since then I’ve invested in Vivos for my gym shoes and I love them. I feel so much ground contact with more stabilty; I can feel my foot working and can connect the dots from my foot to the knee to the hip.

If you’re not ready to jump fully in to barefoot shoes, I would recommend the Reebok Nano shoe as an excellent alternative. They exhibit many similarities - zero drop from the heel, wide toe box, support around the foot (instead of the arch) - but have more rubber underneath which provide more cushioning. I use these for days when I’m doing lunges or box jumps when I need more softness to reduce impact and pain.


Did you know that your knee follows what your foot and hip tell it to do? Knee pain and improper tracking can come from insufficient inputs from the joints above and below it. Did you know that a stable hip can reduce lower back pain? An important part of that equation is a strong base!

Want to learn more about how to improve foot mechanics, strengthen your feet and how minimalist shoes can help? Join our free community event on June 12th and 13th in collaboration with VivoBarefoot Canada!

Check out the event link here for more info.

Sunday June 12th - 10am-4pm

Monday June 13th - 12-6pm


Here’s a video from our friends at The Foot Collective about why you should care about your feet:

Meaghan's Favourite lululemon Pieces

There is no denying I’ve been a major fan of lululemon for over 15 years. As an active teen getting into the gym, I was forced to wear soccer shorts, baggy cotton t-shirts and ill-fitting sports bras because women’s athletic wear was, well, non-existent at that time. (Okay, so I’m dating myself here a little!).

Since my very first pair of lululemon pants (which I still have and use, by the way), I’ve been hooked. From the gym to hiking to snowboarding to work, my lululemon gear takes me everywhere. I get asked all of the time about what my favourite pieces are so I thought I’d share here so you know exactly what I love and why I can’t get enough.


—TRAINING/GYM —

INVIGORATE HIGH RISE TIGHT (25”)

When this pant first hit the scene, I was immediately hooked. The buttery soft feel of the Align yoga pant plus the performance of the Fast & Free AND POCKETS? You had me at pockets.

What I love:

  • Moisture-wicking and quick-dry

  • Tight waistband so they don’t fall down

  • Large and stretchy pockets for any size of iPhone

  • The perfect length (25”) which is full length on my short frame (5’3”) but also perfectly cropped for my taller pals

  • Also available in 23”and 28”

Shop for them here: https://creatoriq.cc/3V35vOR


ENERGY BRA

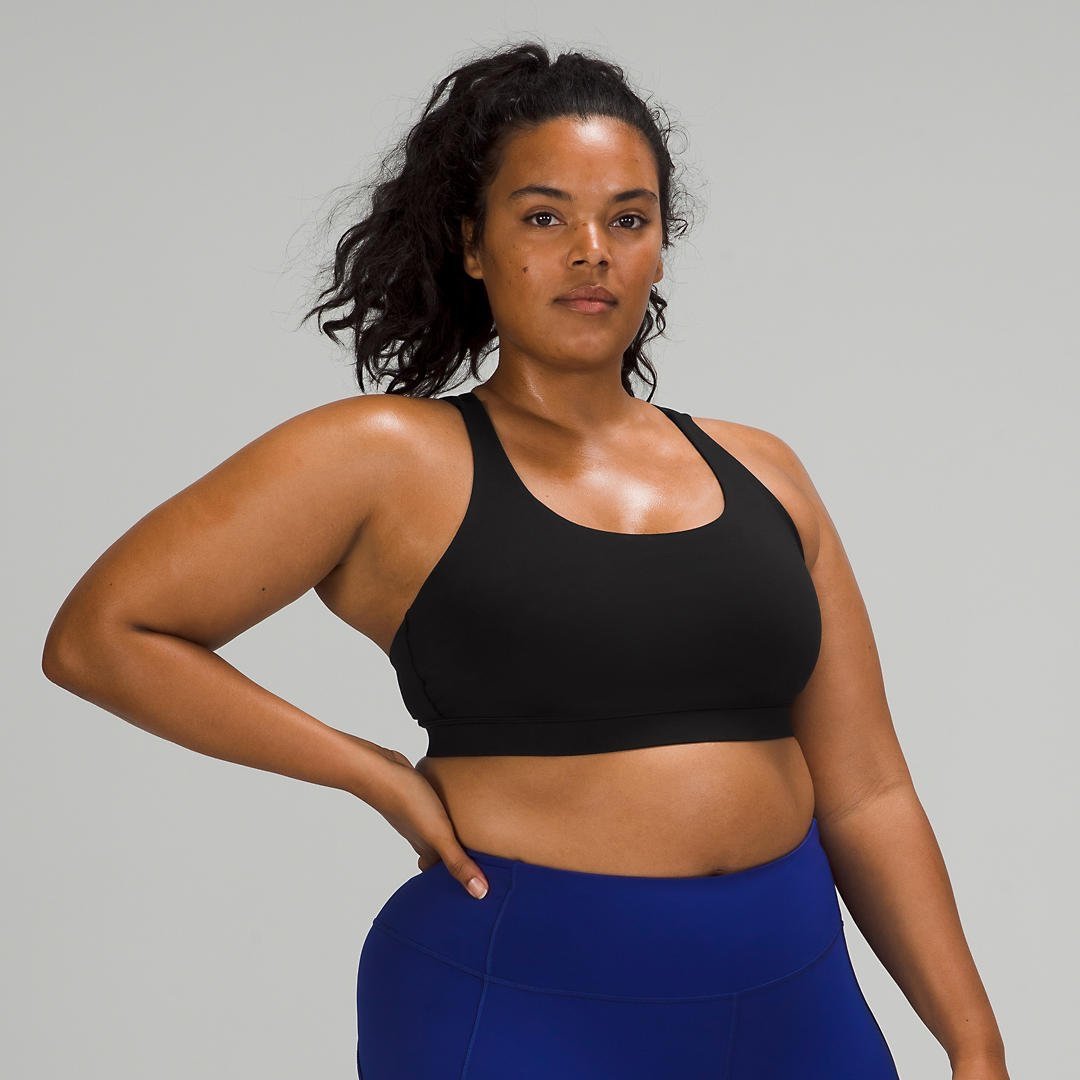
I’ve owned more of these bras than I care to count. They are my go-to, my everyday piece that I wear to hike, workout, stroll around down, go to work or lounge on the couch.

What I love:

  • Has so many varieties - classic, longline, highneck, high support

  • Comfortable and supportive for both smaller and larger chests

  • Great for higher impact activities

  • Very breathable for hiking and summer activities

  • Even as they stretch over the years, I still use them for travel or lounging-around-home bras (and I literally mean years… I still use my very first one)

  • Classic style that fits under all types of tank tops

Shop for it here: https://creatoriq.cc/3VoxLem


WUNDER TRAIN PANT

This perfectly-plain-but-functional pant supports me in the gym but also in yoga and day-to-day. Hands down the most multi-purpose tights in my closet.

What I love:

  • Moisture-wicking and quick-dry

  • Comfortable yet slightly compressive for a hugged feel

  • Tight waistband so they don’t fall down

  • No leg pockets so I can wear them day-to-day with any outfit

  • Offered in a variety of lengths but I prefer the 25”

Shop for them here: https://creatoriq.cc/3Ow7FE2


WUNDER TRAIN LONGLINE BRA (C/D CUP)

This piece can be either worn alone or as a bra under a shirt. With the long line length, I feel covered enough that it feels like a shirt without having to wear the extra layer, or if I want more coverage, I can throw on a light tank and it still looks cute.

What I love:

  • Soft, buttery feel with enough held-in compression that I know my girls are under control

  • Comfortable yet supportive for larger-than-average chests

  • High neck coverage so no peekaboo moments when I’m bent over for a deadlift or burpee-ing around

  • Super frickin’ cute even with a pair of high-waisted denim shorts in the summer months

Shop for it here: https://creatoriq.cc/3U3l6MT


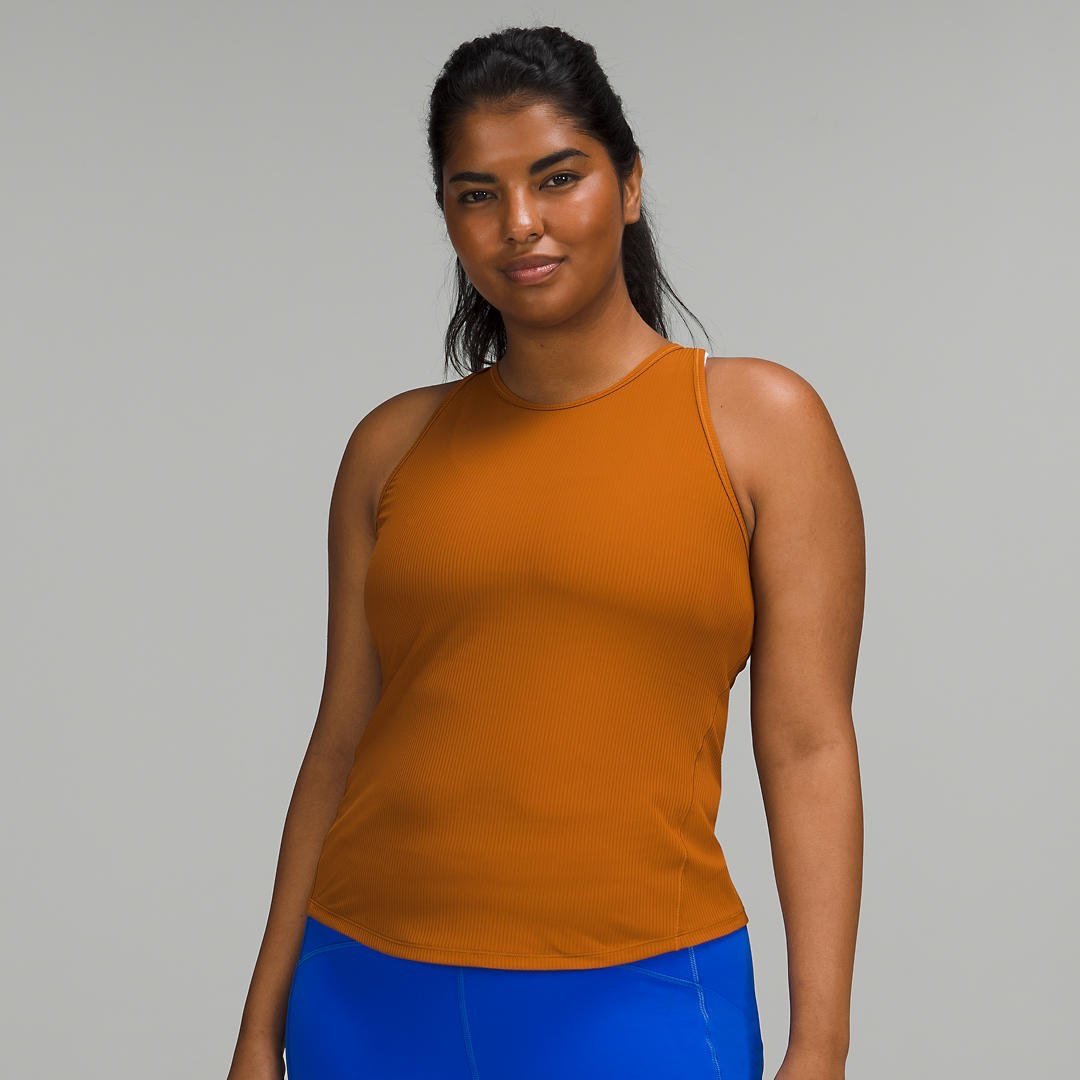
Base Pace Ribbed Tank Top

This new-kid-on-the-block has quickly become my new favourite tank. WIth a flattering cut and high neck fit, I feel perfectly covered but with enough breathability that I stay cool as a cucumber no matter how hard I’m working.

What I love:

  • Full coverage tank that still breathes

  • Can order your normal size for a snug fit or one size up for a more loose, casual look

  • Perfect length even for those of us with shorter torsos

  • Ribbing detail gives it a nice textured look

Shop for it here: https://creatoriq.cc/3TWeUX6


—HIKING —

Fast and free high rise tight (25”)

This classic tight has been around for a long time and for a good reason - they’re breathable, light-weight, quick-drying and have loads of pockets, hence why these are my go-to hiking pants especially for mega hot BC summers.

What I love:

  • Side and waist pockets to hold phones, snacks, keys, anything!

  • So thin and light that it feels like you’re not wearing pants at all

  • No seam around the ankle makes them comfortable with socks in hiking boots

  • Very stretchy and comfortable waistband for long days on the trails

Shop for them here: https://creatoriq.cc/3V4DG8G


swiftly racerback tank

Another classic lululemon item, the Run Swiftly Tank is my go-to for sweaty situations. With Silverescent to keep stink away and mesh panels to keep you cool in the spots you need it most. I also love the long sleeve version (see below) to layer on top of the tank for cool starts and warm finishes on big trail days.

What I love:

  • Classic fit that will never go out of style

  • Breathable and anti-stink for super hot days

  • It literally never stinks… I don’t know how they do it

  • Layerable with other Swiftly pieces

  • Light and packable

Shop for it here: https://creatoriq.cc/3EyN6Cz


SWIFTLY tech LONG SLEEVE top, race length

This staple is always in my activewear wardrobe. On it’s own or as a layer on outdoor active days, this multi-purpose top provides a full-coverage, anti-stink layer that works great if your hike starts out a little chilly or, as we know all to well in BC, there’s a lot of mosquitoes and you need a bit of protection.

What I love:

  • Lightweight, breathable and packable

  • Can be worn in the gym, on the mountain or on the plane

  • Literally. Never. Smells. (Magic).

  • Has thumbholes - because who doesn’t love those

  • Feels like a second skin

Shop for it here: https://creatoriq.cc/3GHCSCC


For reference, I’m usually between 130-140 lbs and 5’3” tall with an athletic build and a 32F bust size. I usually wear a size 6 in tops/bras and 4 or 6 in bottoms. I like my items to be quite tight for compression and also because overtime they can loosen slightly.

I hope you’ve found this helpful! Please let me know if you have any questions - message me on Instagram - @msutts :)

Happy shopping!

Disclaimer: As a Legacy Ambassador for lululemon, shopping through my links will provide me with a small commission at no extra cost to you. This small act helps to support me and my time to create free resources for our community. Note that purchasing any item through these links will allow me to obtain commission so don’t worry if these exact items aren’t your style. Thank you for using these links… now get out there and get after it!

Intro to Understanding Concussions

Hi! If you are reading this, THANK YOU AND WELCOME. My name is Makenzi and I’m a Registered Kinesiologist. My journey into concussion rehab started when I graduated from Brock University back in 2017. I worked for a small company out of London, Ontario that helped rehabilitate people who were involved in motor vehicle and work place accidents, I saw a lot. From acute injuries like a broken arm, to catastrophic injuries like a spinal cord injury, the clients I saw were complex. Not only did these individuals suffer from visible, physical injuries, but a lot of them suffered from concussions or mild traumatic brain injuries.

Working closely with these individuals week to week opened my eyes to the world of concussions. The complexity and individualism in terms of their recovery, how it affected their day to day activities, their relationships, their home life and their social life. It ignited a fire in me to want to do more to help people experiencing a mild traumatic brain injury. I want people to be able to talk more freely about concussions and the struggles experienced while living with them. I want to create a safe space for people to ask questions and feel supported. By using this platform to share my knowledge and experience I'm moving toward achieving that goal. 

DISCLAIMER

These blogs are meant to give you some insight into concussion research and concussion rehabilitation. Concussion research is elaborate and at times, hard to understand. These blogs are meant to simplify the science around concussions, and provide helpful information for you to use whether you are experiencing a concussion or know someone who is. This is not a completely comprehensive look at concussions; There is a ton of research out there that we may not touch on. If you are someone who is experiencing a concussion, please seek medical attention. These blogs are meant to support you or a loved one in their concussion journey, not replace seeking individualised help. 


Let's dive in... 


"You have a concussion." It's a phrase that often leads to more questions than answers. Over the past few decades the injury, what causes it and how to treat it has come into a new light. More recently, thanks to Will Smith and his excellent performance as Dr. Bennett Omalu in the 2015 blockbuster hit, "Concussion."  But the term concussion is not new. It was established long ago. I'm talking 10th Century long ago. It's taken centuries for us to figure out the true definition of concussion and how we can efficiently diagnose and treat them. Why? Because brains are complicated and it's critical you remember that. 

Have you ever heard the phrase, "Sit in a dark room and rest" when talking about concussions? For a long time, we treated a concussion like a scratch. Put a bandaid on it, in a couple days you'll be fine. However, due to recent research we've learned this is very much not the case. Like any visible, physical injury, rest just isn't enough. There is a full individualised approach for concussion rehabilitation, just like there is for a sprained ankle or broken femur. 

What happens when you don't take care of a sprained ankle? Well, you probably sprain it again (and again, and again), and live with chronic pain and the annoyance of having 'bad ankles'. What happens when you don't take care of a concussion? You live with, at times, life-altering symptoms that persist overtime, which directly affect your quality of life and day to day activities. Not to mention, multiple blows to the head can lead to a greater risk of developing a degenerative disease such as Alzheimer's, Dementia and Psychosis.  

So what gives?! Why does it seem like we don't treat our brains, you know, the organ that conducts all thoughts, feelings, functions in our body, like we treat any other injury? Why do we neglect seeking help for our brain? 


Concussion Overview

Anyone remember that Pokemon movie where Mewtew is encased in a tank filled with fluid and he's just chilling until he breaks out and dominates all the Pokemon? No? Just me? Well, the tank that Mewtew was in is an excellent representation of our brain in our skull. 

Our brain is enclosed within our skull and is surrounded by cerebral spinal fluid that acts as a cushy barrier between the soft, fragile, butter-like brain, and the hard rigidness of the interior skull. The brain is just floating, chilling as Mewtew does, orchestrating the many activities in the body until, a direct or indirect blow, jarring, or blast to the head or body causes the brain to accelerate towards the skull and crash into it. The result? A disruption of brain function from bruising, broken blood vessels, swelling, increased pressure, or nerve damage. 

After impact, the brain is very unhappy. It shows its unhappiness through a wide variety of symptoms. Many people associate a concussion with having a headache. Headaches are a common symptom, but did you know you can experience physical, emotional, mental and behavioural symptoms? This may look like being irritated more easily, sleeping disruptions, double vision, feeling depressed, lack of concentration, or simply just feeling not yourself, or, 'off'. 

There is no one-symptom-fits-all experience for concussions. Everyone experiences different symptoms, to different extremes ranging from mild to severe. Furthermore, some people may experience the onset of symptoms instantly, or, may experience symptoms overtime. That's where concussion recovery is very tricky. Remember, brains are complicated. Recovery is not linear. It comes with some trial and error, an incredible amount of mindfulness, and most importantly, and perhaps the most challenging for people, patience. 

Concussion rehab can be incredibly frustrating, but like anything difficult in life we go through, it teaches us very valuable lessons. People learn to slow down, learn to become aware of their bodies and how their bodies react to the world around them. People learn to appreciate and show gratitude towards day to day life. People solidify the understanding that we as human beings are incredibly resilient. We are built to survive (Shout out to evolution for getting us where we are today!). Your journey may be long and hard, but I promise you, if you put in the work and keep an open mind, you will be able to create a happy, sustainable, healthy (concussion-symptom free) life. 

This series of blogs will feature specific topics on concussions and concussion rehabilitation, including a breakdown of the concussion rehab guidelines, the systems in your head that work together (or don't), exercise and diet with concussions, and more. 

I always look forward to receiving feedback, good or bad. So if you like what you read (or don't) or you have more questions, please reach out to makenzi@peaktrainingwhistler.com. If you're wondering something, there's a good chance someone else out in the world has had the same question too. 

THE BIGGEST MISTAKE WHEN REHABBING

So you’ve done your prescribed physiotherapy and you feel ready to get back on the slopes – but how confident are you? Have you done enough to prevent the same injury again? We’ve seen it numerous times - people reinjure themselves after supposedly doing “everything right” with their physiotherapy program but what they are often missing is bringing those exercises into the bigger picture. They often fail to implement training the larger movements that will be used and challenged during sport.

edits_332.jpg


There is a systematic way to create a concrete plan to rehab your current injury and prevent another one:


1.     Establish joint-specific functional mobility (flexibility + stability) with appropriate ROM (range of motion) with adequate motor control

2.     Address the joints above and below the site of injury – do those joints have adequate strength, stability and motor control? If not, were they implicit in developing the injury in the first place?

3.     Once the smaller, more localized joint movements are controlled, you need to bring them into larger movement patterns with proper strength & conditioning exercises

4.     Start with lower-challenge exercises, such as banded rotator cuff strengthening, then progress to more complex movements, like landmine presses and eventually, explosive movements like a push press. 


Start small. Master the basics. Strengthen. Challenge different systems. Build tolerance.


Athletes and weekend warriors alike often crush the first part of rehab but then forget about the rest. That’s where ACTIVE REHABILITATION comes into play. So what exactly is it?

edits_119.jpg

Active rehabilitation is an evidence-based treatment model that uses progressive exercise and range of motion techniques to help you overcome both acute and chronic injuries. Administered by a Kinesiologist or an accredited coach, an active rehabilitation program can correct faulty body mechanics and restore mobility and strength to painful joints and movement patterns. A progressive rehabilitation program, in conjunction with passive treatments such as those administered by physiotherapy or massage therapy, is the quickest and most efficient method to hasten your return to work, play or general activities of daily living. 

Who is it for?

  • Athletes returning to sport after an acute injury such as dislocated shoulder, fractured tibia, etc

  • Active people who find they have “nagging” pains, such as ongoing knee and shoulder problems

  • Individuals with chronic illness and ongoing pain from their conditions, such as those with Ehlers-Danlos, autoimmune diseases and arthritis


What will the program entail?

  • A complimentary intake consultation to discuss in depth your medical and injury history along with current lifestyle factors

  • A comprehensive, progressive program that will increase in challenge each week as you continually improve

  • Prescribed home and/or gym exercises to ensure that you’re progressing each week

  • An educational experience to better understand your personal experience of pain and how you can manage it successfully on your own


How will the program be executed?

  • You will meet with your coach between 1-3 times per week depending on goals and schedules

  • You will be asked to complete 3-5 days of your own home and/or gym exercises

  • We recommend a minimum 3 month program (12 sessions) to obtain full benefit


Whether your injury was a few short weeks ago or a decade ago, a properly applied Active Rehabilitation program will set you up for a successful season on the slopes. It’s never too late to improve flexibilty, increase strength and capacity, and to bulletproof your body for a great winter.

Ready to get start or just have a question about how our team can help you? Reach out to team@peaktrainingwhistler.com or fill out the form below.

Happy National Kinesiology Week!

Brought to you by the Canadian Kinesiology Association.

Whistler-Blackcomb-e1458086543635.jpg

TELUS #StandWithOwners Entry


Hello! I’m Meaghan and I’m the owner of Peak Training + Rehab Studio.

edits_523.jpg

I’m honoured to submit the following as my application for the Telus #StandWithOwners Support Small Business initiative.

TELL US ABOUT YOUR BUSINESS, HOW IT STARTED, HOW IT’S GOING AND WHAT YOU OFFER.


Peak Training Studio started off in late 2019 as a solo, female-led Kinesiology business in which I found a niche and provided the community with an education in strength training, functional mobility and effective pain reduction for my beloved, active community. My rehabilitation services proved to be a valuable asset in a small town with very few Kinesiologists. I was also able to provide education and skills regarding chronic illness management which became a passion of mine after a life-changing diagnosis of an autoimmune disease called Rheumatoid Arthritis only five short years ago. Though my skillset focuses on the physical, I also incorporate the mental and emotional well-being of each of my clients by providing them safe space to experience their pain, mindset and challenges that coincide with injury rehabilitation and chronic pain management. I am honoured to be a part of my client’s journey to mental and physical wellness.

We currently offer 1-hour in-person sessions, small group personal training (max 6 people), remote training sessions and individualized program design. We plan to expand further into the digital market to provide strength and rehabilitation programs to clientele outside of our geographical area.

edits_332.jpg

HOW HAS YOUR BUSINESS TRANSFORMED THIS PAST YEAR? HOW HAS TECHNOLOGY PLAYED A ROLE?


After a brief shutdown at the start of the pandemic, there was a high demand from other practitioners in town to find a location so that they could serve their clientele in a safe, clean space since many gyms and recreational locations were not available due to Covid restrictions. After developing a second business plan, I acquired a lease for a second studio in the same building which allowed me to grow the team from a “me” to a “we” with a Studio Coordinator, Kinesiologists, Certified Trainers and Yoga Instructors. Further, the expansion allowed me to rent to other Kinesiologists, trainers and practitioners in the surrounding area so that they can serve their own clientele. Not only are we now able to support our patrons and community members, we’re also able to support other professionals in the area to build their business and create valuable services. 

Technology has a multi-layered impact on our business. Firstly, during the initial lockdown, I was able to serve my clients with the use of telehealth sessions in order to support their physical and mental well-being while we were all confined to our homes. This opportunity showed me that video sessions were in fact as useful and productive as in-person sessions and that it was a service I will continue to provide in the future. This continuation of services via telehealth was integral to maintaining my client base and continuing to have a positive impact on my surrounding community with both individual and group sessions. I was also able to team up with companies such as lululemon to provide free, fun workouts through social media to support our virtual community as we faced the difficulties of the first few months of Covid.


After building a team following the initial lockdown, I finally took the plunge to use an online booking system to streamline our services and to provide a superior customer experience. This type of technology has been an integral part of our expansion. We’ve also extended our offerings to include training programs sold via direct-to-client PDF sales and to develop a YouTube channel in order to support clients and community members free of charge. Though our use of technology has not been to the extent that I would like, our focus in the new year will be on developing online programs and systems to connect with potential clients outside of our geographical area.

Further, technology played an imperative role with bookkeeping and system processes with the use of Quickbooks to record and dissect our expanding revenue streams and will soon provide me with the ability to create projections for the future of Peak Training Studio. 

HOW HAS YOUR BUSINESS MAKE AN IMPACT ON THE LOCAL COMMUNITY?


Peak Training Studio offers an inclusive, safe, empowering space that focuses as much on physical well-being as we do mental and emotional health. We pride ourselves on our ability to integrate into the community with educational offerings that support all aspects of wellness. We help locals return to their career, sport or active lifestyle with the implementation of personalized programs to ensure every person feels supported and can in turn, provide their person best to their surrounding peers. We believe that when we can help people to feel their best and become the strongest version of themselves, they can continue the positive ripple effect throughout the rest of our community.

edits_355.jpg

HOW CAN CANADIANS SUPPORT OWERS LIKE YOU?


Canadians can support small business owners like myself by engaging in a genuine way, whether it’s by purchasing our products, partaking in our services, sharing our social media pages or utilizing our educational videos. Support comes in many forms and we thoroughly believe that providing useful information on our platforms for free will increase customer engagement to create long-term relationships with our dedicated following which will intern improve revenue. As we continue to grow and expand, we hope to provide our products to the nation through the use of technology and telehealth in order to support all Canadians no matter their geographical location. 

edits_10.jpg
edits_96.jpg
edits_22.jpg
Tbromley_PeakTraining092021-8.jpg

M O V E • M I N D F U L L Y

Peak Training x Scandinave Spa

Mindful exercise is a new and much-needed approach to your training regime that’s all about exerting the self physically while turning inwards mentally. We know meditation is good for mental well-being but sitting still can be a challenge for many – myself included – so finding a balance between the two has been paramount for not only our physical health but also mental well-being.


There’s certainly something to be said about tuning into your favourite podcast or playlist and zoning out while you do a simple activity – like walking, running, cycling – to let your mind run free while your body keeps moving. Alternatively, there’s something incredibly meditative about focusing in on what you’re accomplishing and feeling your own strength and power while you exercise.


Commonly, gym-goers and home-exercisers do their workout to distract themselves or to completely disengage from their bodies – they’re running, jumping, sweating and moving without a connection to how it actually feels. They finish the session tired and beat-up without actually cultivating the important mental component to movement. As a Certified Personal Trainer, I can attest to how few clients come to me and say that actually think about where they should feel an exercise or even how to perform it properly. Once they attune their minds to focus on each movement, they are often blown away at how “challenging” a once easy-seeming exercise can become. The mind-to-muscle connection has been proven to reap incredible benefits physically but we’re now starting to understand that there is a strong positive mental component as well. 


So – what are the benefits of mindful training?


  • Decreased likelihood of injury: When you focus intently on your form and the muscles you should be engaging, you’re able to execute each exercise with improved precision and alignment which will prevent acute or overuse injuries in the long run.

  • A more effective and efficient workout: When you fully mentally engage in your training session, you take shorter rest breaks, you can fit more exercises into your workout and you’ll accomplish more in a shorter period of time. Put down the phone and get your head into the session!

  • More focus = Better results: Strengthening the mind muscle connection is imperative to obtaining the desired results from your workouts. If you want to build or strengthen your glutes, for example, you should be able to feel them engage. If you’re squatting or lunging without the targeted sensations, you’re not likely to get the results you desire.

  • Higher likelihood of adherence to your workout program: Setting smaller, daily goals is correlated to maintaining long-term success with goal setting so when you take the focus off the end goal and enjoy the process more, you will ultimately get to your anticipated results with the utmost efficiency.


So – how do we go about creating mindfulness in your training program?


  1. Prepare your training program for the day ahead of time and write down your goals for each session, including which muscles you’re focusing on so you know where you should feel each exercise.

  2. Start your workout with a quick body scan. Your body scan will dictate how you perform your warm-up and what level of intensity you’re willing to perform that day. Where do you feel the most tightness/restriction/discomfort? Focus your warm-up on those areas. For example, if your shoulders and back feel tight, focus on stretching and opening this area with properly applied mobility work and deep breathing.

  3. Put your phone on airplane mode so that there are no distractions from notifications.

  4. Slow down your repetitions. Use pauses. Squeeze the target muscles. Focus on where you should feel it with each rep. Think about the contraction and the relaxation of each movement. Feel the stabilization in your core. Create stability in your posture and alignment.

  5. If your mind wanders, take a deep breath to refocus your attention and keep on the program.

  6. When stretching or foam rolling during your cool down, ensure you’re moving slowly and breathing into the target muscles to obtain the most relaxation and benefit. Stretching or rolling are only as effective as the breaths you put into it. Without true, deep relaxation, the nervous system simply will not allow the muscle to lengthen fully.


If you’re looking to further improve your mindful movement, the Scandinave Spa’s notorious hot-cold-relax sequence is the idealistic plan to deepen your mindfulness practice and to optimize recovery after a focused training session. Hydrotherapy has been proven to increase blood flow, decrease inflammation and improve performance post-workout. Maximizing your time by utilizing the stretching area and the relaxation rooms to complete a thorough recovery that will leave you feeling physically and mentally refreshed, connected and ready to tackle whatever is thrown at you.


Our mental state is like a muscle itself – when we continually practice our focus and attention to the moment, the easier and more frequent this skillset becomes. We’re able to decrease overall stress, lower our emotional reactions and to be fully present with ourselves and our loved ones. If you can achieve a state of connection and presence throughout the challenge of a workout or a cold pool plunge, imagine the ripple effect this can have on other parts of your life. 

edits_122.jpg


TOP 5 EXERCISES TO PREVENT KNEE PAIN WHEN HIKING

TOP 5 EXERCISES TO PREVENT KNEE PAIN WHEN HIKING

IMG_9320.JPG

You’ve made it – you’ve reached the summit.

The cool, mountain breeze hits your face and you feel elated and achieved. Your reward for a hike-well-done is a breathtaking view and a delicious snack (or cheeky beer if you’re keen to carry the extra weight). 

And then it hits you - that sharp and aggravating knee pain. Immediately, your peace and serenity break and you start dreading the hike down, not to mention how you’ll feel tomorrow when you hobble out of bed in the morning.

So many people are familiar with this unfortunate sensation and yet we feel powerless to get rid of it. Everyone accepts it as the norm for hiking (and skiing… and running…) but it doesn’t have to be this way. It’s not enough to roll and stretch after the fact; you must be pro-active to strengthen and stabilize your body in order to prevent it. As Benjamin Franklin famously said, “an ounce of prevention is worth a pound of cure” and he couldn’t have been more accurate. 

Sure, relieving tension around the hips and knees will feel better temporarily but it won’t stop the cause of the pain in the first place. To decrease or ideally avoid the pain all together, you must address the mechanical problems causing it. Here’s where proper strength training comes into play. The knee is often a pain centre through no fault of its own – it’s at the mercy of the hips above it and the ankle below it. In order to protect the knee, these often overlooked joints need to move optimally. How do we ensure that? By strengthening the following muscles: 

Glute+diagram.png


  • Glutes, especially glute medius

  • Hamstrings

  • Core, especially transverse abdominis and obliques


These muscles work together to stabilize the pelvis which subsequently stabilizes the knee further down the chain. The foot plays a huge role here too but for now, we will focus our attention on the functionality of the hip. So how can we strengthen these easily and effectively in order to keep your knees happy after a big day up (and down!) the slope?


Complete these exercises 3-4 days per week for 3-4 sets of 10-12 reps using a moderate weight.

1.     Single leg deadlifts – Strengthening hamstrings and glutes simultaneously, this exercise delivers maximum benefit with minimal effort to stabilize the hips and subsequently, those knees!

Single leg deadlift

Single leg deadlift

  • Stabilize yourself on one foot then hinge through the hip to lower your chest and lift the back leg

  • Keep hips levels as you hinge forward so that you feel the exercise in the glute of the standing leg

  • Return to the start my squeezing the glute and pressing the hip through

2.     Step-ups – Focusing on the driving up action but also on the lowering portion will provide valuable cues to help you safely manoeuvre the mountain.

Forward step-ups

Forward step-ups

  • Start with your front foot on a 12-18” box (depending on strength and height)

  • Hinge forward to load weight over front foot then press strongly into the box to step yourself up

  • Do not kick off of the back leg

  • Slowly control the lower back down to the start position - avoid the urge to drop without control

3.     Lateral band walks – We think of hiking as a forward motion but there’s a lot of lateral strength and control that needs to be developed to create bulletproof joints.

Lateral band walks aka. Monster walks

Lateral band walks aka. Monster walks

  • Place a medium or heavy fitness loop just above the knees or below the knees

  • Hinge through the hips to push butt back with chest slightly forward

  • Step sideways with the 'forward' leg while stabilizing with the 'back' leg.

  • Think about opening your knees wide to lead the movement instead of leading with your feet

4.     Deadbugs with a Swiss ball – Deep core stabilization and strength will not only support the hips and subsequently the knees, but may also prevent any lower back pain.

Deadbug with Swiss ball

Deadbug with Swiss ball

  • Lay on your back with a ball between your arms and knees

  • Brace your core before extending the arm and opposite leg towards the floor

  • Core should stay tight and not allow the back to move

  • Continue by alternating sides for desired number of reps

5.     Single leg step-downs – An uncommon but effective exercise, this one lets you gauge your progress from the above exercises. Paying close attention to how your hip, knee and ankle align will give you clues to how well your programming is paying off.

Single leg step-down

Single leg step-down

  • Start with one foot near the edge of a 6-12” box

  • Slowly lower by bending the knee and hip simultaneously with control until the opposite heel taps the ground

  • Knees should stay aligned on top of foot (not collapse inwards)

  • Hips should stay level throughout (not drop to one side)

  • The slower you go, the better this is for stabilizing and strengthening so take your time


In addition to strengthening these muscles, the way we think about moving up and down the mountain can have profound impact on our experience of pain. Here are a few simple cues can help you to better engage the big muscles around our hips and knees to absorb the stress taking pressure off your joints:

1.     Hinge forward on the hike up and use your glutes and quads

2.     Sit back into your hips on the way down

3.     Softly absorb the steps on the way down instead of jarring into the knees

4.     Always move mindfully especially when you are exhausted on the way back down (even though it’s the last thing you want to do!)


With all these new skills and strength in mind, I’m sure you’re keen to hit the trails. Here are some fun and proggresively challenging local Whistler favourites:

Train Wreck Hike

Cheakamus Lake

Crater Rim

Rainbow Lake


Looking for a comprehensive program to support your hiking endeavors this summer?

Sign up for the REACH YOUR PEAK 12-week program that gets delivered straight to your phone through our app. You’ll be guided through 2-3 workouts per week with detailed videos to explain precisely how to execute the exercises in the program. Click HERE to reigster for only $175 for the entire 12-week program.

See you on the peak!

IMG_7009.jpg


S T R O N G • A T • H O M E

S T R O N G • A T • H O M E

You ask - How do I make home workouts more effective? I know, I know - They don’t feel hard enough and you’re “not lifting weight so my muscles are going to shrivel up and diiieeee!” Well, this would be true if you sat on your 🍑 all day, every day and watched Netflix nonstop... BUT if you want to maintain your strength and muscle mass, there are tried and true ways of keeping your strength and muscle mass even without heavy weight. Stimulating the muscular and nervous systems will help to retain these qualities… IF you use proven techniques to make the exercises we are doing more effective.

W I N T E R • P R E P

W I N T E R • P R E P

When the leaves start to change and the snow line starts to slowly creep down the mountain, I’m ready to kick it into high gear. As a personal trainer in a mountain town, this is “go time” for me and for all of my clients. Whether they’re daily ski enthusiasts or weekend snowboard warriors, they all know the value of taking care of their minds and bodies before they start tackling big days on the mountain. 

R A I N B O W • L A K E

R A I N B O W • L A K E

So I hear you want to climb a mountain?

How F I T do you feel to tackle that hike you’ve been dreaming about? Maybe it’s something daunting like Wedgemount or something more mellow like Elfin Lakes. Whatever your adventure of choice may be, myself and Lynn from What Lynn Loves Blog have got you covered - we’re bringing you our 5 favourite hikes this summer season! You can check out her rendition here www.whatlynnloves.com/whistler/